Showing posts with label inspired. Show all posts

Monday, January 7, 2013

Inspired By

Inspired by Claire at Say Yes to Hoboken to make a tassel necklace:


Most of the time, my Pinterest pins are for future inspiration, but every once in awhile, something comes along that says "make me now!" So I did.

The directions were very clear, and I was easily able to get all of the supplies at Michael's. I used DMC floss E317, from the Precious Metal Effects line. I do have a tip for you if you are having a hard time placing the knots just where you want.

Tie a knot around a large needle.


You can then move the needle up and down the length of your string till you get it to the position you want. Then gently withdraw the needle as you tighten the knot.


After putting on the beads on either side, I put both pieces of string through 2 final beads. The last bead stays in a fixed position, but the other one can side up and down to adjust the length of the necklace.


Saturday, January 5, 2013

Inspired By

Inspired by Sarah to make a scarf hanger:


You've probably already seen this idea all over Pinterest. It was appealing to me because it's so modular. I love to sort clothing and accessories by color so that they're easier to find, and I loved the fact that you could add a shower curtain ring anywhere on the hanger without having to shift other things around. As soon as I saw it about a year ago, I put my scarves onto shower curtain rings and put them on a hanger.

The problem, though, was that no matter how hard I tried to keep things evenly distributed, the rings would slip and slide all over, and all the weight would eventually shift to one side, causing the hanger to be lopsided. If you know me at all, you'd know this would irk me! It was actually a little better when there were more scarves on the hanger, but still...


In re-organizing my closet this week, I decided I'd search for other solutions. I love the idea of installing towel bars to hang the scarves, but I didn't have a good space that would work. I looked at various scarf organizers online and then made a trip to the Container Store to evaluate all the ones they had. With some of the commercially available scarf organizers, it was hard to get out one scarf without disturbing the others, or else there was a lot of overlap and things got bulky. Plus, none of them were modular. So I had another look at the hanger + shower curtain ring idea. I tried a wooden hanger, and it was less slippery, but the rings would still slide around. Plus, it wouldn't match the rest of my plastic white hangers, LOL! I didn't want to glue the rings down or put them in fixed positions because then I'd lose some flexibility. So I cut up some foam shelf liner and hot glued it around my hanger. I had the shelf liner on hand already, but I'm sure that felt, fleece, or some other non-slippery fabric would work well.


Now everything stays neat without slipping around, even when there are very few things on the hanger.


I like this so much that I'm hanging my belts this way too. I just orient the ring so that the prong points up and leave it open so that it's easier to get the belt on and off.


Friday, November 9, 2012

Inspired By

Inspired by Print Workshop by Christine Schmidt, via Janet, to do a little stamping:


I took an existing stamp and covered up the wood mounting block with tape to protect it. Then, I just wrapped some leftover cotton yarn (you know I've got plenty of that on hand!) around the block. This is stamped using a regular ink pad onto some paper that's going into my journal.


I love this book! There are so many projects in it that I want to make. (The project in this video is not in the book, and the template is not on the website anymore. However, it's good to watch her technique. You'll be able to preview some of the other projects in the book at the end of the video.)

Sunday, October 28, 2012

Inspired By

Inspired by Butter with a Side of Bread to make pumpkin pretzels:


I love chocolate-covered pretzels (salty + sweet), and these were so cute! I used green Mike & Ikes instead of the original M&Ms.

Sunday, October 21, 2012

Inspired By

Inspired by Ruth Bleakley on Poppytalk to make some relief prints from styrofoam:


This was a fun and easy craft project, and it helped the kids to better appreciate the Japanese woodblock prints we have.

Even though we're doing our best to avoid styrofoam, some of it still makes its way into our house. We clean it and save it in a bin to be taken to the recycling center when it's full enough. For this project, we raided the "stash." We used acrylic paint and a sponge brush since we don't have a brayer.


Wednesday, April 18, 2012

Inspired By

Inspired by Awesomely Awake, via The Parent Water Cooler, to have a Yes Day.

Now, I try to do a lot of things with my kids, but I don't think of my parenting as being necessarily child-centered. We limit their extra-curricular activities and constrain their choices most of the time. They have lots of chores, responsibilities, and consequences. I find myself saying "no" a lot, and if I am to be completely honest, there's not always a "good" reason for it. Sometimes it's just because saying "yes" would be inconvenient or would take more time than I think I can spare. So when I read about the idea, I thought it would be worth a try, to help make sure that

We read the book Yes Day! as a prelude and laid out some ground rules the night before. Basically, I promised to say yes to any reasonable request. They had to understand that since there is only one of me (my husband was working) and two of them, they had to realize that there might be times when we could not have simultaneous yeses; I could not do two different things or be at two different places at once. And finally, I tried to make it clear that it was not a carte blanche shopping day.

The kids started the morning watching TV with breakfast. My kindergartener wanted to go to an egg hunt (this was just before Easter) and go to the Children's Museum. I let her take the lead in how long she wanted to spend on an activity and didn't encourage her to move on to something else just because I was getting bored.


When we were at the grocery store, she wanted to go in the lane where you can scan the items yourself. Normally, I say no because it takes too long--no 6 year old can scan as efficiently as a grocery store clerk--but that day I said yes. I also said yes to playing Monopoly (am I the only one who dislikes that game?).

My older daughter wanted to stay in and relax all morning long, so I said yes to deferring chores till the next day. She lounged, watched TV, and texted her friends as much as she wanted. In the afternoon, she asked to go shopping, so I said yes even though I knew it would be a crowded day at the shopping centers. She did try to test the rule about not having a shopping free-for-all, but I stood firm and she had to limit herself to what she had available in her allowance spending account (that did generate a lot of "no" from me).

All in all, it was a wonderful day. My little one said at one point, "this day just cannot get any better!" There was so little stress, and an unexpected side effect is that the girls didn't bicker with each other at all. I realized that my kindergartener just wants to spend more unhurried time together, while my tween needs more down time by herself to decompress. I get that, and I've been trying to carry some of those lessons forward.

Saturday, March 31, 2012

Inspired By

Inspired by Martha Stewart & Amy Sedaris, via Jill Dater, to award homemaking badges:


Last weekend, I taught my 12-year-old how to iron. We talked about the basics of how to operate an iron, check for fiber content on clothing, and select the proper setting. She practiced on a few different items, including a dress shirt.

On Wednesday, she earned her cooking badge by preparing a whole meal by herself. She found the recipe, added ingredients to our weekly shopping list, and did all the prepping and cooking. She also had to do most of the cleaning. I stayed out of the kitchen and only helped if she got really stuck and called me. Although we often have the girls help out in the kitchen, it's definitely a different experience (for everyone) having one of them actually running the show.


We kept the badges simple--just printed them out on paper, and then she added them to her journal. When I have a little more time, I'm going to design some similar ones for other life skills, including ones for my 6-year-old: tying shoes, operating the washer/dryer, sweeping, etc.

I found a shirt with a button that needs to be replaced, so I guess we'll be working on the sewing badge next! ;-)

Sunday, March 25, 2012

Inspired by

I was inspired by my favorite enabler to start journaling again. Janet introduced me to Smash Books, and I was smitten! It's a perfect blend of journaling and scrapbooking--more fun than the former, less fiddly than the latter. It's not really a new concept, but the entire Smash Book line is really attractively packaged, and I'm a sucker for their marketing. The only thing was that I had a hard time letting go of being able to control which papers were in the books and in which order.

Then I stumbled upon the Arc notebooks at Staples. These are essentially a more affordable version of the Circa notebooks I had coveted from Levenger catalogs years ago, and they're similar to Rollabind systems. As far as I can tell, they're all interchangeable. I love the flexibility of this system!

I settled on a pink leather junior-sized book (8.5" x 5.5"). I'm calling these my Smarc books--part Smash, part Arc!

As you can see, there's a pocket in the front and a pen loop in the back. The loop is not big enough to hold a Smash Pen, but it'll fit most other pens. The Arc notebooks come with ruled paper, but I took some of it out and added pretty printed cardstock. These were on sale at Michael's for just $10 for a pack of 48 sheets. I cut the cardstock to the size of the notebook and got 2 pages per sheet, with some decorative scraps left over. If I had gotten 8.5" x 11" cardstock, it would have been an even easier cut to get 2 perfectly-sized pages from one sheet. Then, I used the Arc paper punch to get my cardstock pages to pop right into the notebook. If I change my mind about the order of the sheets, it's easy to rearrange them.


I picked up a pocket divider to store little scraps in the back of the notebook, as well as a a zip pocket that can be added to the top of the notebook for journaling on the go!


I got some other fun Smash accessories--pads of journaling prompts, washi tape, clips, and paper pockets. I also picked up some other cute office products and brought out some of my scrapbooking supplies to assemble a little kit. The girls and I have had fun setting aside a bit of time most evenings to work on our journals!


Monday, March 12, 2012

A Little Loopsy

I came across some really cute Lalaloopsy cakes and was inspired to make one for my daughter's party. Many of them include really cute fondant buttons, but since none of us like fondant, I opted instead to make button cookies to decorate the cake. My older daughter helped! Since I don't have circle cutters, we just used different sizes of bottle caps--not as pretty, but they served just fine. I used the same cookie recipe that JaeBellz did, and the food dye was Wilton Icing Colors in rose, teal, and violet. This particular recipe holds its shape really well. Since the cookies didn't spread, we decided it was much easier to roll out the dough onto parchment paper, cut out the circles, and then pick up the scraps around them. The parchment paper then went directly onto a baking sheet to go into the oven. This saved having to transfer the cookies individually and risk messing them up. The cookies that weren't used for the cake were given out as part of the favor bags.

I had a lot of fun with the cake topper. Lalaloopsy packages have cute handles on the top, and of course I saved them because they looked too good to discard. I got a 4" round pressboard box and hot glued the handle to the top.


It doesn't matter if it's messy because no one will see that. (And in case you're curious, I was able to later dismantle it, peel off the hot glue, and save the handle intact). The box was covered with frosting, and then I added a couple of her mini dolls. Ta da!


My daughter had requested an ombre pink and white cake, and this one was made with 1 box of white cake mix and 1 box of strawberry cake mix. The bottom layer is strawberry, the top layer is white, and the middle layer was created by mixing the 2 together. If you're using a kitchen scale to make sure everything is even, it's about 600g of batter in each layer.

We also made a few mini cakes for the dolls out of Golden Oreos and decorated them with Candy Buttons. They sat on mini cupcake stands I had made for a previous party.


Saturday, February 11, 2012

Inspired By

Inspired by Two Peas & Their Pod, via Britni, to make red velvet crinkle cookies:


These are so delicious and just as easy! We've made similar cookies with lemon or strawberry flavors, and the latter would also have been great for Valentine's Day, but I already had a box of red velvet cake mix in the pantry and decided to use that.

You do have to be careful about two things if you cut out the heart shapes:

#1: If you cut while the cookies are still sitting on a warm cookie sheet like I did, be advised that your cookie cutter will start to get hot. I used a metal cookie cutter and it really transferred the heat! We have some Kevlar gloves that the kids use when they help out in the kitchen (to keep them from cutting themselves), and I ended up having to put those on.

#2: You'll end up with a plateful of scraps, and it will take a tremendous amount of willpower not to eat them all at one go!

Thursday, February 2, 2012

Inspired By

Inspired by Little Paper House, via Janet, to pack the girls a little treat in their lunchboxes:


These are Pepperidge Farm Milano cookies with little almond ears. The "dirt" is brownie bits. Happy Groundhog Day! I plan to watch Groundhog Day tonight. It's one of my favorite movies and I never tire of it!

Friday, January 27, 2012

Inspired By

Inspired by numerous Pins to make some melted crayon art:


There are lots of different versions of this, and various techniques, including using a hair dryer, glue gun, or even an oven to melt your crayons.

My little one had to do a 100th Day of School project, which involved making a display of 100 things. We brainstormed some ideas, and she looked at a bunch of pictures before settling on using 100 crayons. She had hoped to make a heart shape, but we couldn't fit all the crayons onto the canvas we were using, so we decided to make 2 rows of crayons instead. This was a good exercise in the concept of "half," as she had to sort out the colors and use half of a given color on the top and half on the bottom. I put lines of hot glue onto the canvas, working small sections at a time, and she arranged the crayons into place. (ETA: This was meant as a family project. If you want your child to do it on his own, I'd recommend using tacky craft glue over regular white glue). We then put the whole thing into a large cardboard box to protect from wayward drips and splatters, but actually, it was all very tidy and we had no mess at all.

The crayons were melted using a hairdryer with the heat set on high and the fan speed set on low. My daughters and I took turns holding the hairdryer very close to the crayons (and obviously they were supervised during their turns). I was going to make a note of how long it took, but honestly, it was so much fun watching the process that I lost track of time! There are already a number of instructions out there in case you want to make your own. We used the one at 52 Kitchen Adventures as a reference.

Saturday, January 7, 2012

Inspired By

Inspired by Lisa Storms, via Heather Vo, to make marshmallow snowmen:


This is what we made for my daughter to bring to school on her snack day this month. I had intended to make little Fruit Roll-Up scarfs, and I thought we already had some in the pantry, but we didn't, so the snowmen had to do without.

Saturday, December 31, 2011

Inspired By

Inspired by Kelli Crowe to make a New Year's Time Capsule:


We actually started this in January and have dropped in little things all year long to remind us of some of the things that have happened and some of the places we've gone. We'll take everything out this evening and spend some time looking at them to relive the memories! I used a glass-etching cream to put the year on the time capsule jar, and I have ones prepped for the next couple of years.

Here's to a Happy New Year to all of you!

Wednesday, December 28, 2011

Inspired By

Inspired by I Heart Organizing, via Doan, to make an earring holder:


Many years ago, waaaayyyy before Pinterest (was there really such a time?), I had made myself a similar earring holder, but I used a wire mesh. Until I saw that pin, I had no idea that decorative aluminum sheets were pretty readily available at home supply stores. My older daughter got her ears pierced last month and she received some earrings for Christmas. When she asked for an earring organizer, we went to Home Depot and picked out a lincane sheet. We would have preferred silver, but it wasn't available. Jen from I Heart Organizing used her version to hang dangling earrings, but my daughter's earrings all have posts with backs, so we modified the design a little. We found a hinged double frame at Michael's, which allowed the frame to stand on its own and give her easy access to the back. We were also limited to sheets that had smaller holes since the earrings she got are pretty tiny and we didn't want them slipping right through some of the bigger holes. To fit the sheet into the frame, one option would have been to cut the sheet to the exact dimensions of the opening and then glue it in place in the back. I decided instead to cut it just a bit taller than the opening and then wedge it in to the upper and lower grooves on the back of the frame. This means that the sheet flexes out a bit towards the front, but my daughter liked the look, and it felt really secure.

We have enough of the lincane sheet left over to make a couple more of these in the future if she needs them.

Wednesday, December 21, 2011

Inspired By

Can you stand one more food-related Christmas post? I was inspired by Kitchen Fun with My Three Sons, via Grace Ford Wuensche, to make Rudolph pancakes:


I used Hershey's Kisses for the eyes and the bottom of a strawberry for the nose. As much as they liked the snowman pancakes we made earlier this year, the kids thought these were even cuter!

Inspired By

Inspired by Cookies & Cups, via Grace Wuensche, to make a Santa Party Mix:


The Santa hats are a little time consuming, but they're very easy to make. In fact, the hardest part was actually finding Bugles for the hats since my local stores don't seem to stock them a lot. I had to have a little extra help from an elf to locate them. For the snack mix, I used pretzels, Rice Chex, almonds, and Whoppers instead of the original recipe since we have to keep ours peanut-free. It would have been more colorful if we could have used M&Ms, but even the plain ones are processed with peanuts, so they're a no-no for us. I really miss Hershey's Kissables because they were a tasty and safe alternative to M&Ms, but they're no longer made. Regardless, the mix was a big hit!

Sunday, November 13, 2011

Inspired By

Inspired by Arian Armstrong, via Amy McGill, to make mini hat ornaments:


The instructions were really clear. These were fun to make, and I was able to recruit my little elves to help me! I think Noro scraps make for particularly cute hats.

Friday, October 28, 2011

Inspired By

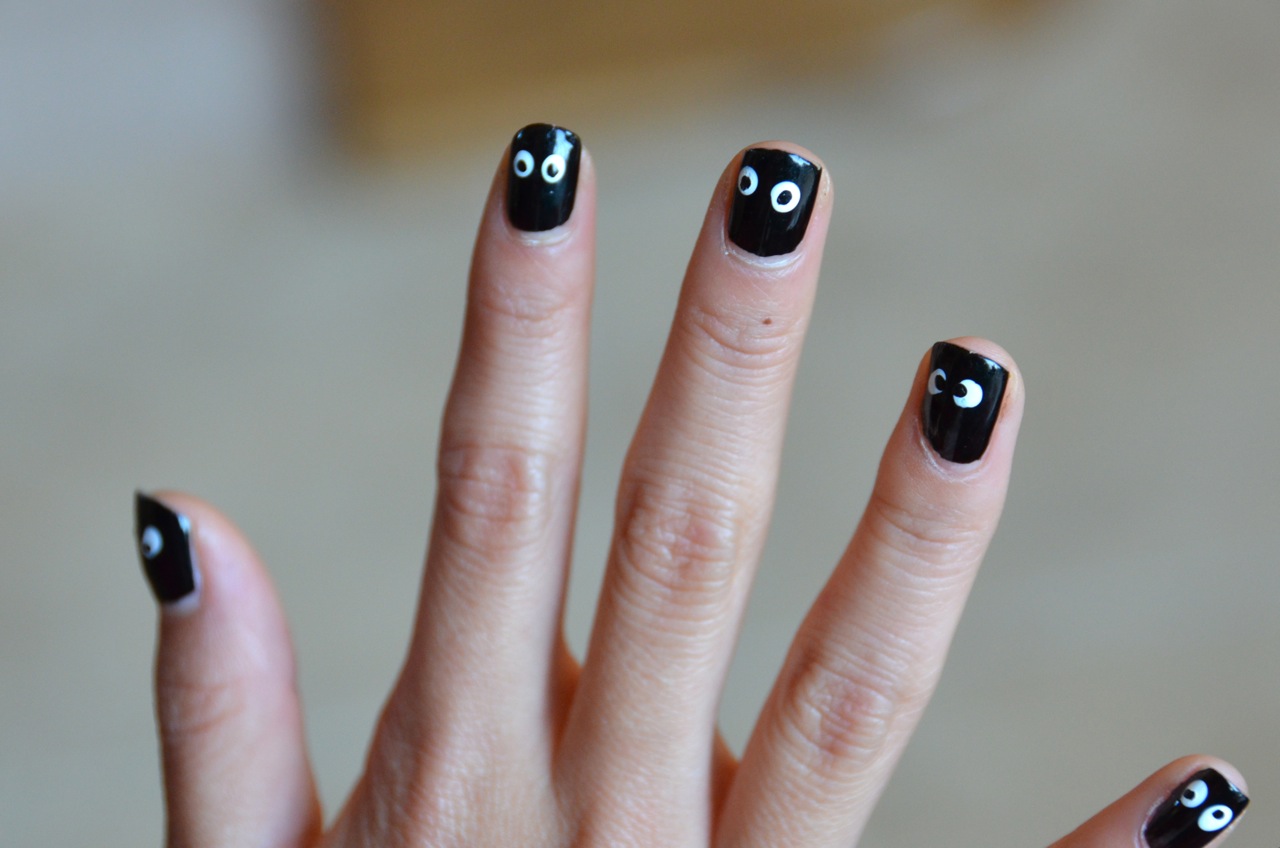
Inspired by The Beauty Department to create a sweet candy corn manicure for my younger daughter


and by Ice Queen to make a spookier look for my tween